This documentation will highlight how to Add a New Page
To Add New Page you will first need to access Website999 Dashboard if you have not logged into Website999 yet. (Skip this step if you are already logged into Website999 Dashboard)
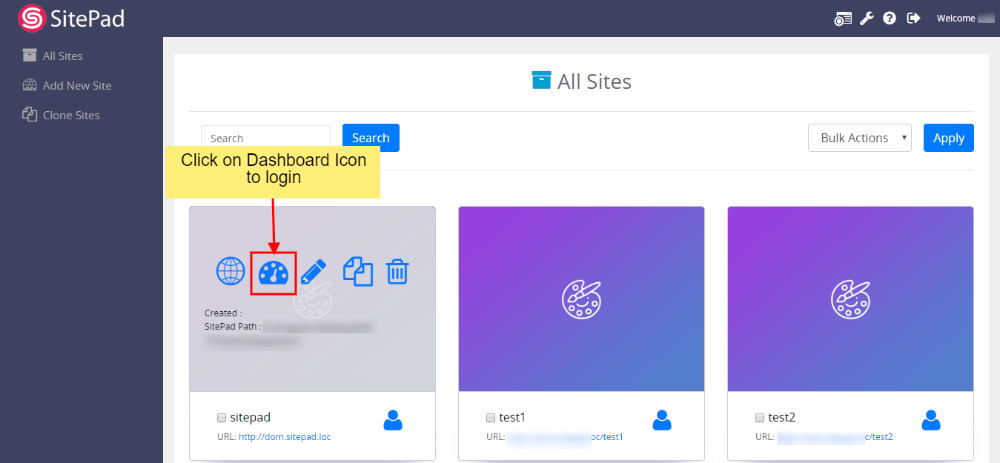
Now click on Dashboard Icon to access Website999 Dashboard. (Skip this step if you are already logged into Website999 Dashboard)
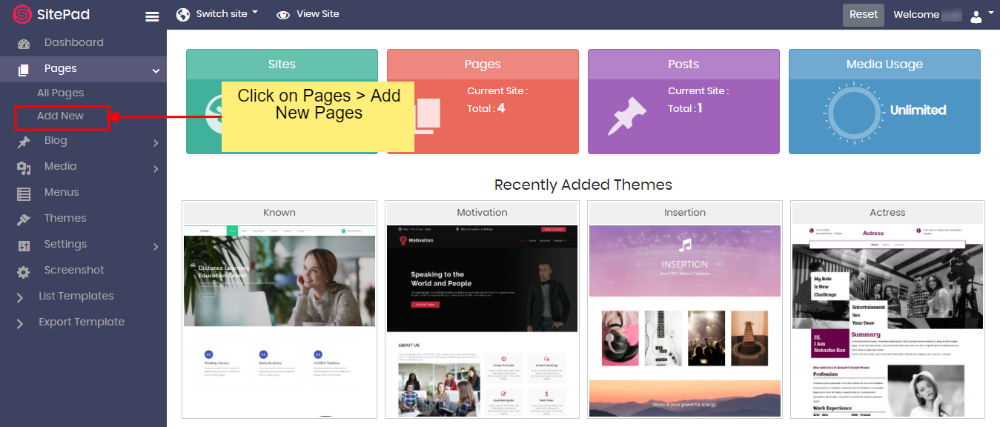
You will be redirected to Website999 Dashboard, Click on Pages then click on Add New Page.
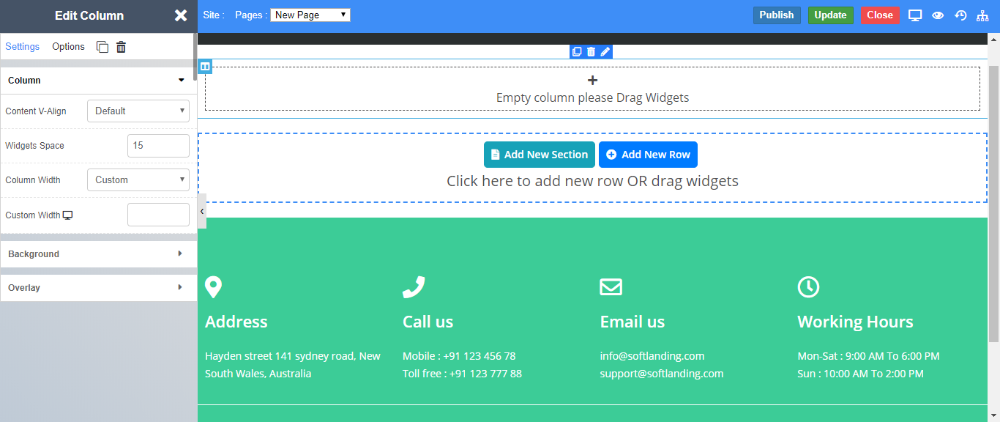
On click of Add New Page, you will be redirected towards the new page where you can create your new page with our Brand New Editor
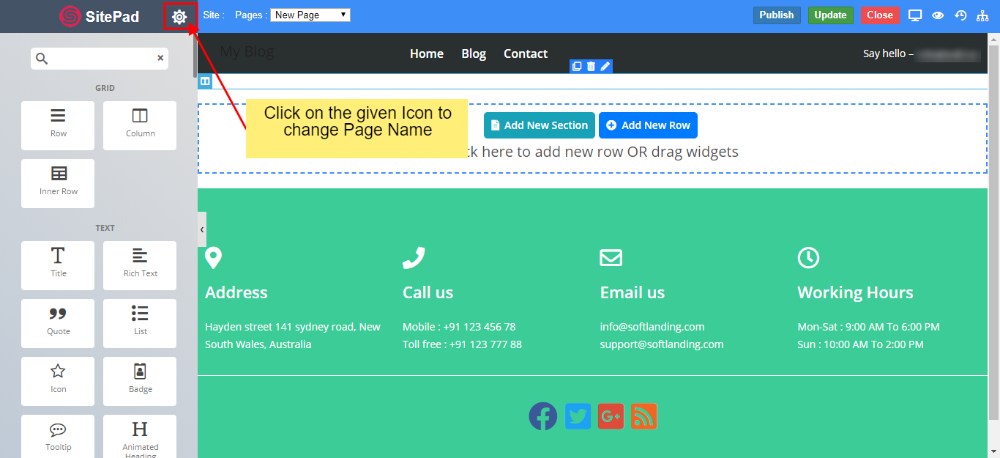
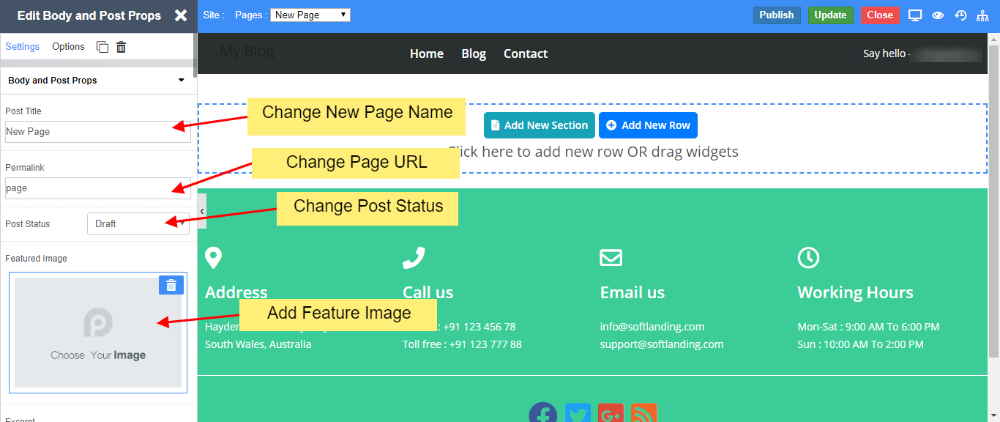
Click on Settings Icon to update Page settings for the current page.
You will find options such as
Add/Update Page Name
Add/Update Page URL
Add/Update Page status
Add/Update Feature Image
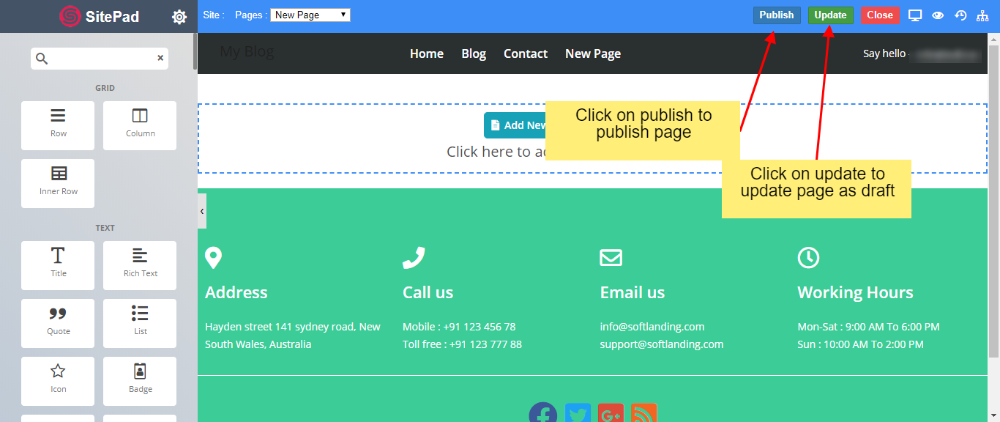
Once finished you can click on the Update button to update the page or Publish button to publish the content of the page.
Edit a page
This documentation will highlight how to Edit a Page.
To Edit a Page you will first need to access Website999 Dashboard if you have not logged into Website999 yet. (Skip this step if you are already logged into Website999 Dashboard)
Now click on Dashboard Icon to access Website999 Dashboard. (Skip this step if you are already logged into Website999 Dashboard)
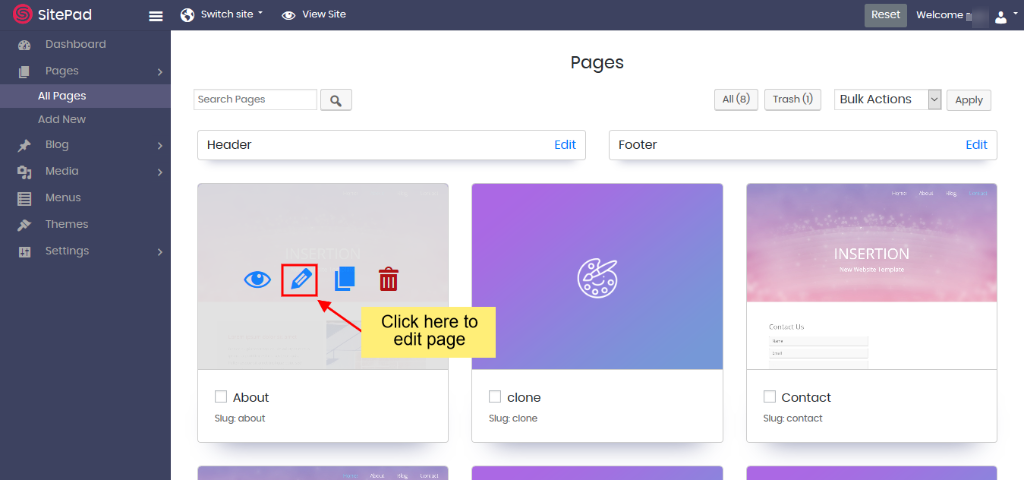
You will be redirected to SitePad Dashboard, Click on Pages then click on All Pages.
On clicking the All Pages, you will see a list of pages. Hover over the page you want to Edit. After hovering, you will see the pencil icon, Click on the pencil icon to Edit the page.
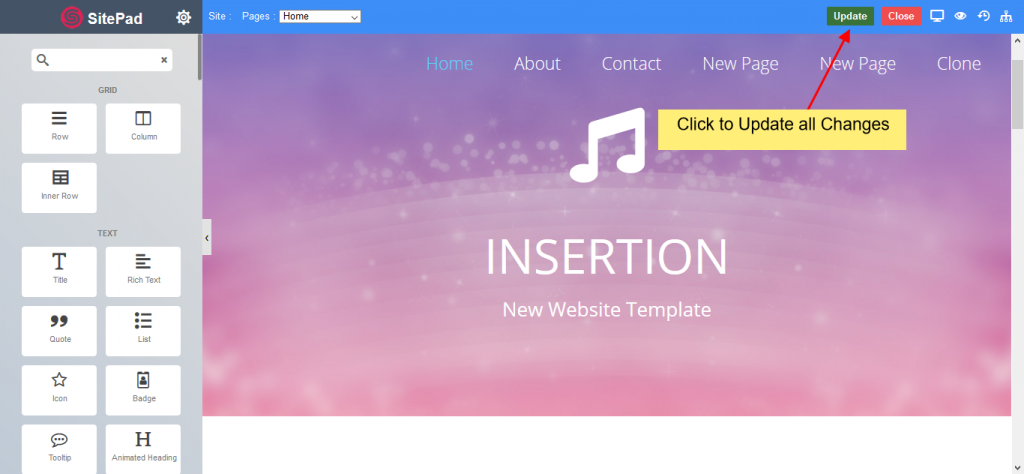
After clicking on the edit (pencil) icon, you will be redirected to the Website999 Editor, where you can edit and update the page.
You will find options such as
Add/Update Page Name
Add/Update Page URL
Add/Update Page status
Add/Update Feature Image
And you can also change the page content as needed.
Once finished you can click on the Update button to update All the changes of the cloned page.
Clone a Page
This documentation will highlight how to Clone a Page.
To Clone a Page you will first need to access Website999 Dashboard if you have not logged into Website999 yet. (Skip this step if you are already logged into Website999 Dashboard)
Now click on Dashboard Icon to access Website999 Dashboard. (Skip this step if you are already logged into Website999 Dashboard)
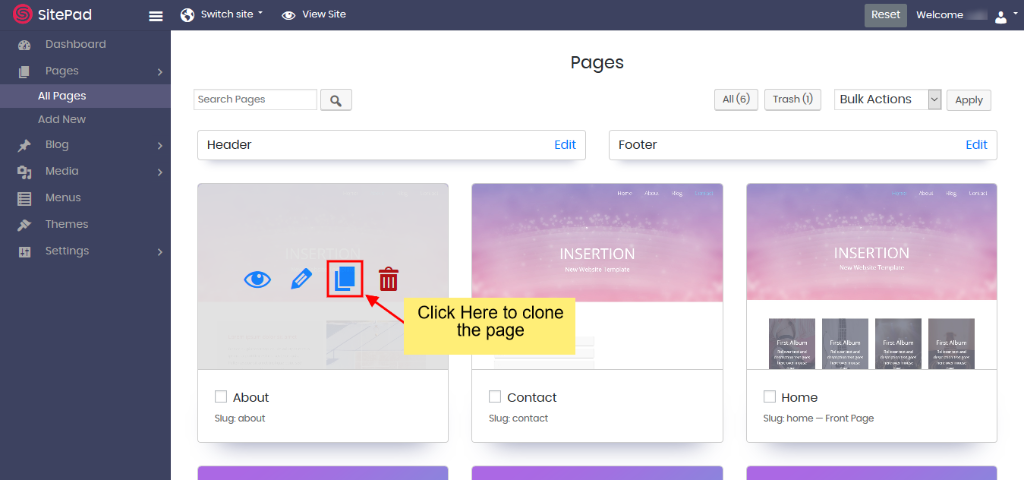
You will be redirected to Website999 Dashboard, Click on Pages then click on All Pages.
On clicking the All Pages, you will see a list of pages. Hover over the page you want to clone. After hovering, you will see the clone icon, Click on the clone icon to Clone the page.
After clicking on the clone icon, you will be redirected towards the newly cloned page where you need to update the page settings. Click on Settings Icon to update Page settings for the current page.
You will find options such as
Add/Update Page Name
Add/Update Page URL
Add/Update Page status
Add/Update Feature Image
And you can also change the page content as needed.
Once finished you can click on the Update button to update All the changes of the cloned page.
Delete a Page
On this page
Move Single Page to Trash
Move Multiple Pages to Trash
Deleting Pages
This documentation will highlight how to Delete a Page.
Move Single Page to Trash
To Delete a Page you will first need to access Website999 Website Dashboard if you have not logged into Website999 yet. (Skip this step if you are already logged into Website999 Dashboard)
Now click on Dashboard Icon to access Website999 Dashboard. (Skip this step if you are already logged into Website999 Dashboard)
You will be redirected to Website999 Dashboard, Click on Pages then click on All Pages.
On the access of All Pages, you will be redirected towards all pages then, you will view all the pages you’ve created then hover on the page then you will view delete Icon. Click on the icon to delete the page.
On click of Delete Icon, the page will be moved to trash.
Move Multiple Pages to Trash
All Pages are moved to trash first in case if the user wants to restore the pages
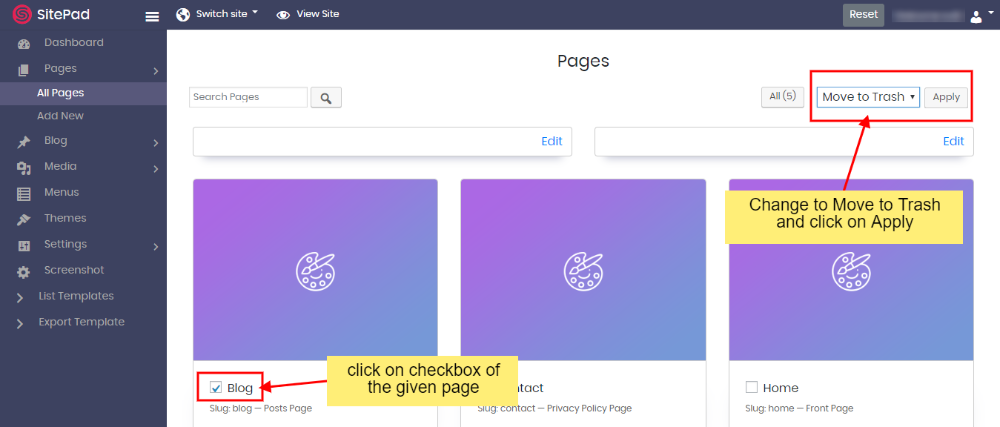
To move multiple pages to Trash you will need to select the checkboxes of the pages you want to move to Trash
Deleting Pages
Click on Trash to view pages in Trash Button to Open Trash Page.
To delete Pages or selected Pages, the user can select the checkbox of the given pages and select Delete Permanently and click apply or click on Empty Trash to delete all pages.
Restore Page
On this page
Overview
Restore a Page
Overview
This documentation will highlight how to restore a deleted website page. You will first need to access Website999 Website Dashboard if you have not logged into Website999 yet. The following is a screenshot of the Website999 Dashboard.
Restore a Page
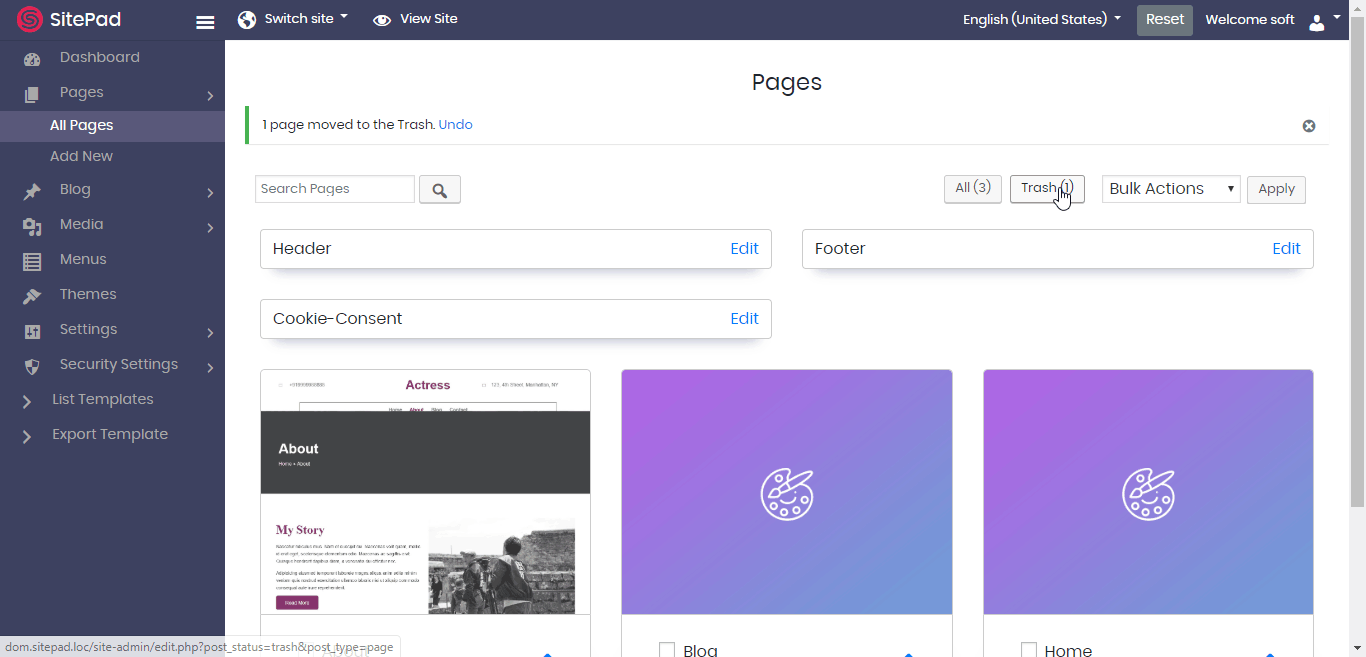
Once the page has been deleted, it will stay in the Trash till you don’t delete it permanently. Hence you can restore the page from the trash until you permanently delete the post / page. To restore the page click on the Trash button you see in the Blog -> All Pages wizard. You can multi-select the pages to restore or restore a page singly. Refer to the following screenshot on how to do so :
Shopping Basket
Stay Inspired.
We're Here To Make Your Website.
Design tips, trends, and ideas — in your inbox.
Join who get exclusive design insights in their inbox.