This guide will show you how to Add New Site or Edit Site
Login to Control Panel
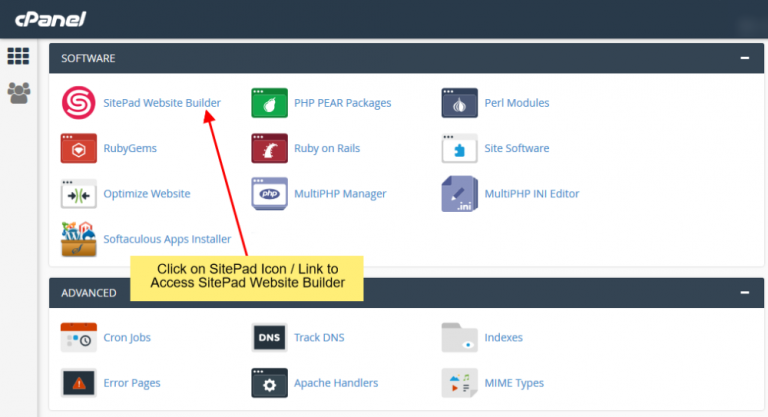
Firstly Login to your Control Panel (e.g. cPanel’s URL will be https://domain.com:2083) and login with your details. There click on the Website999 Icon or Link.
You will be redirected to website999 EnduserDashboard.
Add New Site
Once you are on the website999 Enduser dashboard. You will see Add New Site option on Sidebar Navigation Menu.
Click on Add New Site.
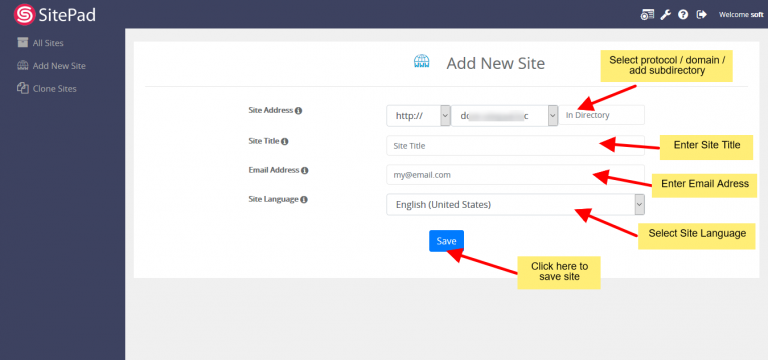
Now you will see all the options regarding adding new sites.
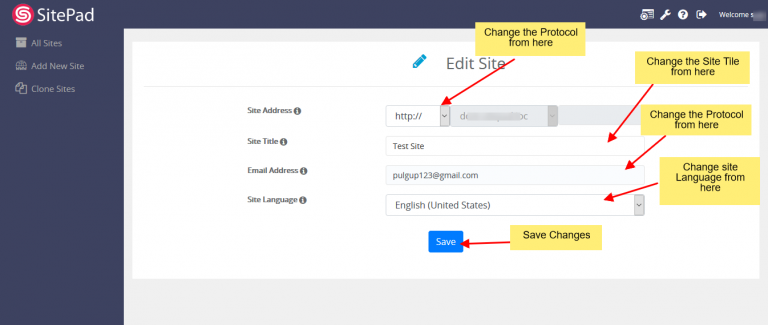
Select Protocol and Domain for your new website and then add a new directory. Next, you need to Enter Site Title and admin email. You can also select the language of your new site. And then click on the Save button.
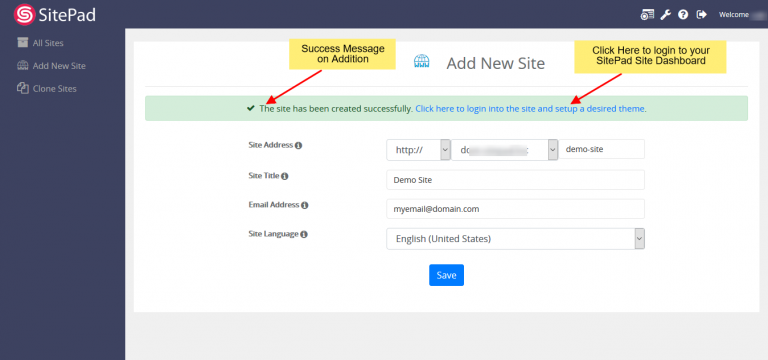
Once the website is added Successfully you will see the success message asking you to login to the Dashboard of the new site.
Edit Site
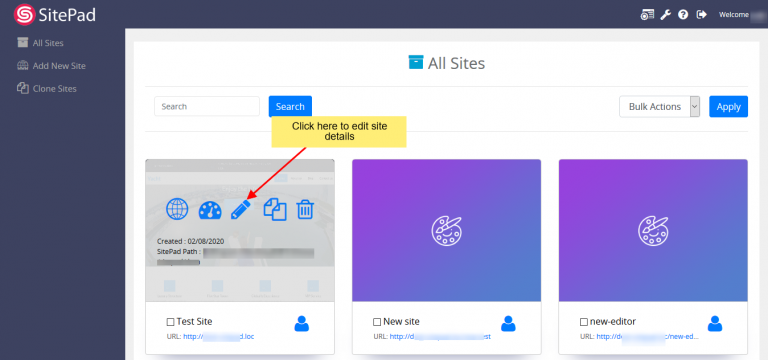
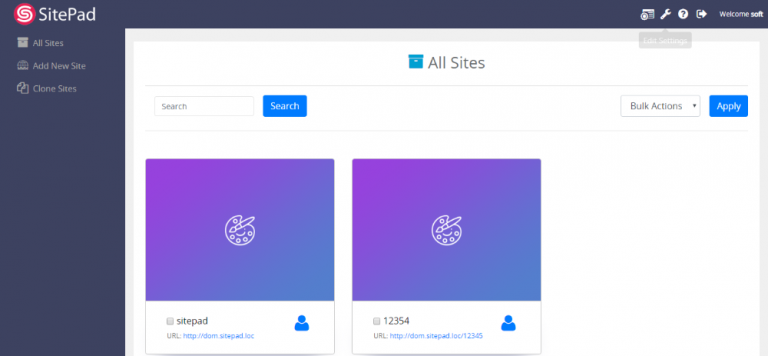
Once you are on the website999 Enduser dashboard. You will see All Sites option on Sidebar Navigation Menu.
When you click on the All Sites option, you will see a list of sites. Then you need to hover over the site you want to edit, after hovering you will see a pencil icon, click on the pencil icon to edit your site data.
After clicking on the pencil icon, the edit site form will open. And then you can change the site details as you want.
Clone a Site
On this page
Login to Control Panel
Clone a specific site
Cloning any sites
This documentation will highlight how to delete a particular site or a number of sites in the new editor.
Login to Control Panel
Firstly access to your Control Panel (e.g. cPanel’s URL will be https://domain.com:2083) and log in with your details. There click on the website999 Icon or Link.
After accessing website999 you will be redirected to website999 Dashboard
Clone a specific site
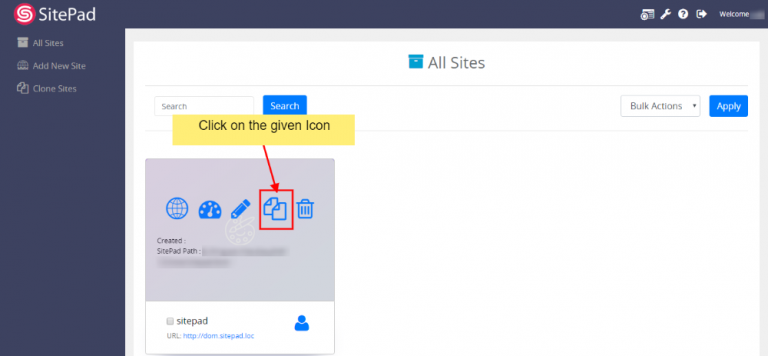
To clone a site you will need to click on Clone Icon.
Once you click on Clone Icon you will be taken to clone wizard.
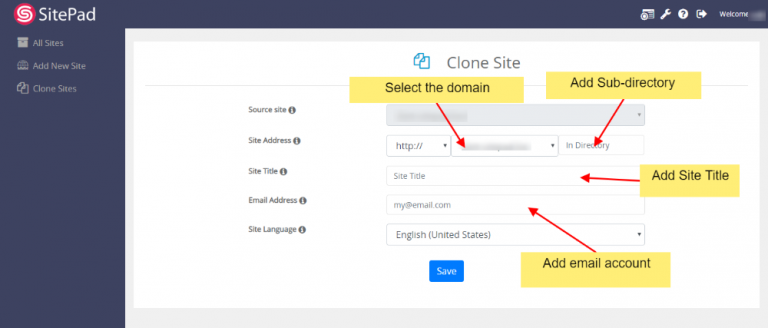
You will find clone wizard options such as:
Select protocol (https:// or https://)
Select Domain (select the domain on which you want to clone site)
Add Sub-directory (if creating a subsite)
Add Site title (to differentiate your added sites in all sites)
Add Email (not compulsory)
Click on Save once added all details
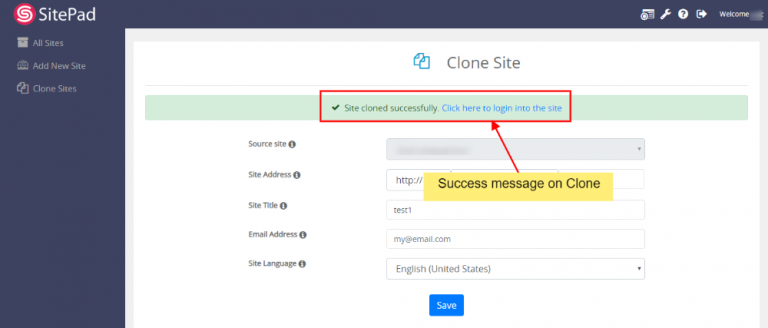
Once on click of the Save button, the site will load for a few minutes and you will be redirected to success page on successful cloning.
Cloning any sites
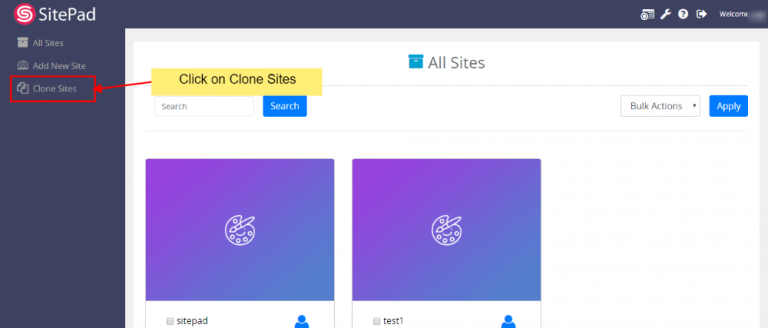
To clone any sites you will need to click on Clone Sites option
You will be redirected to clone wizard
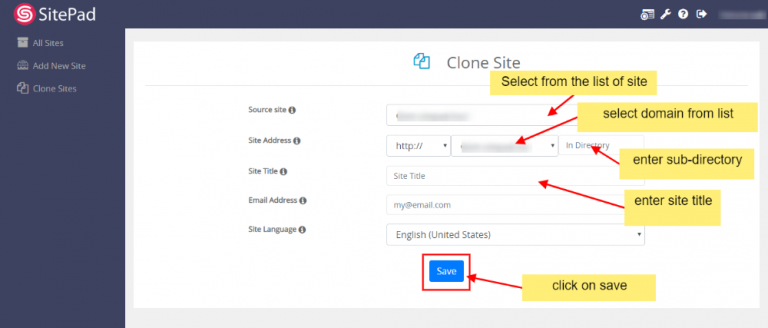
You will find clone wizard options such as:
Select protocol (https:// or https://)
Select the site from which you want to clone the sites.
Select Domain (select the domain on which you want to clone site)
Add Sub-directory (if creating a subsite)
Add Site title (to differentiate your added sites in all sites)
Add Email (not compulsory)
Click on Save once added all details
On click of the save button, it will load the page for a few minutes and then you will get the success message shown in the screen above.
Backup a Site
On this page
Overview
Login to Control Panel
Backup your Site
Overview
This guide will show you how to backup your website999 site. You can backup the site from the website999 plugin in your control panel.
Login to Control Panel
Firstly access to your Control Panel (e.g. cPanel’s URL will be https://domain.com:2083) and log in with your details. There click on the website999 Icon or Link.
After accessing website999 you will be redirected to website999 Dashboard
Backup your Site
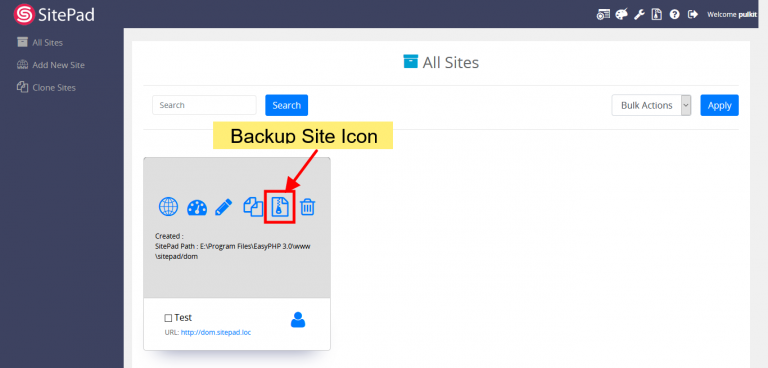
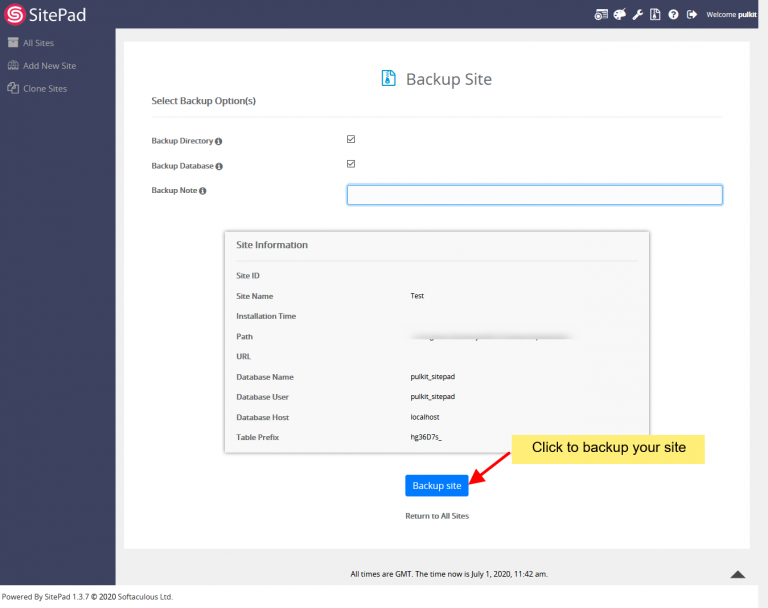
To backup a site you will need to click on the Backup Icon.
Once you click on Backup Icon you will be taken to Backup wizard :
After your site is backed you can access your backups from the Backup List wizard :
Delete a Site
Overview
Login to Control Panel
Backup your Site
This documentation will highlight how to delete a particular site or a number of sites in the new editor.
Login to Control Panel
Firstly Login to your Control Panel (e.g. cPanel’s URL will be https://domain.com:2083) and login with your details. There click on the website999 Icon or Link.
Delete a Site
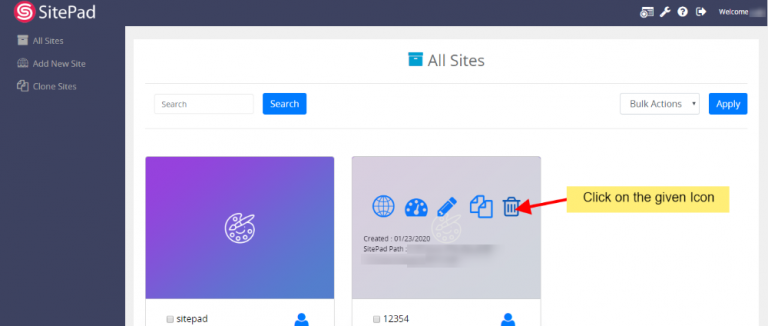
To delete a site you will need to hover your mouse on the given site and click on the Trash icon to delete the particular site.
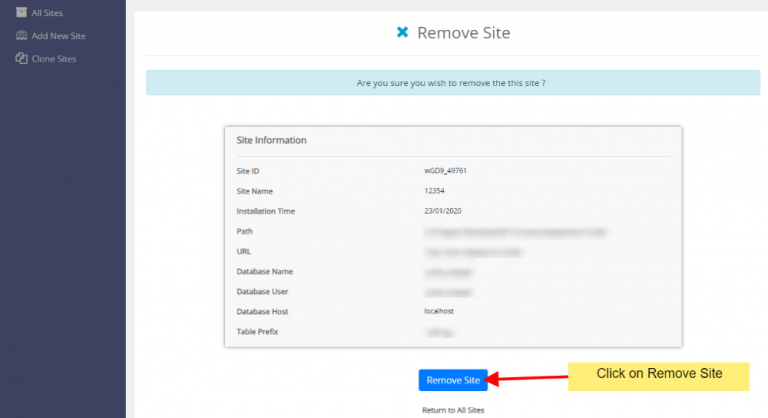
A confirmation page will be shown to confirm if you want to delete the given page or not.
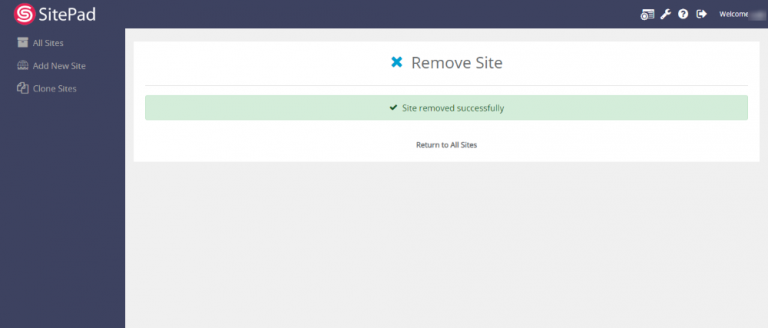
After you click on Remove Site your site will be removed successfully and you will be noted with the success message.
Delete Multiple Site
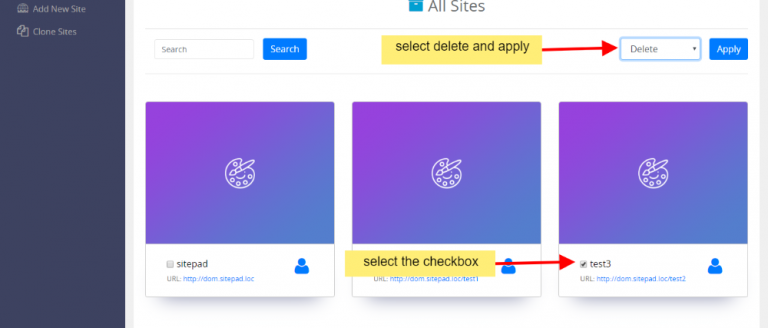
To delete multiple lists of sites you will need to click on the checkboxes of the sites you want to delete as shown in the given screenshot below and then in action tab select Delete.
Note: No confirmation will be asked when deleting multiple sites
Once you click on Apply, the given sites will be deleted and you will be shown same success message as shown above.
Reset a Site
On this page
Overview
Login to website999
Reset the Site
Overview
This guide will show you how to reset your site and choose a new theme. You may want to reset your website if you did not like the previously chosen theme.
Login to website999
You will need to login to website999 first to be able to reset the theme. The procedure to login is listed here.
Reset the Site
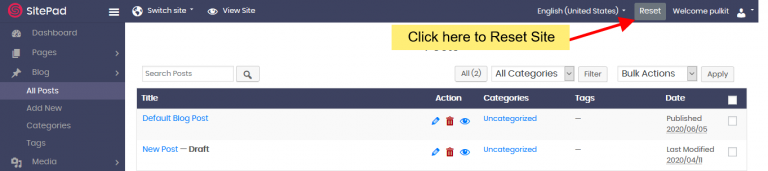
You can see the reset button in the top bar.
You can reset either the :
Full site
Only the Pages
Only the blog posts
After Reseting your Full site, you will be redirected to complete the setup process to set up your next site.
Click on the “Get Started” button to proceed to the next level.
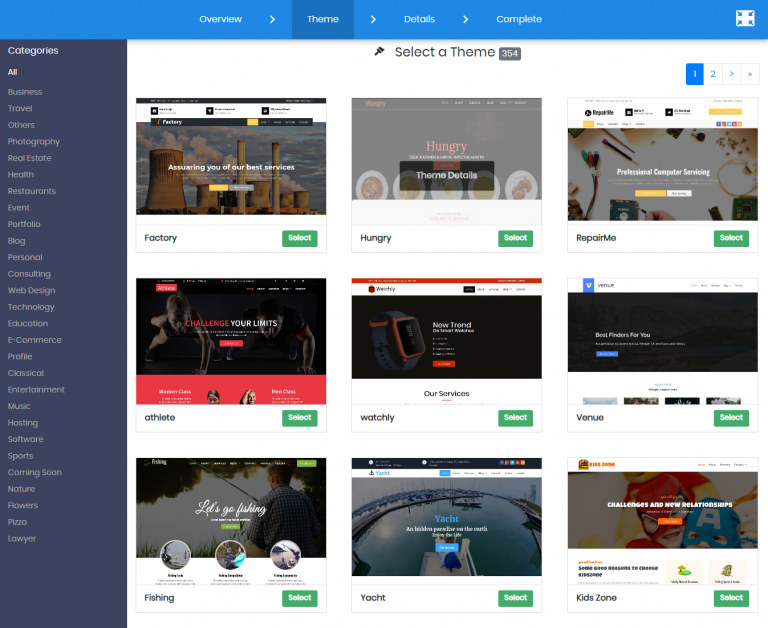
Now you will need to select/choose a theme for your website. You can also search for a Theme through Theme Search Option. Checkout Theme details. Once you find a theme suitable for your website you can click on the Select button to set the theme as a default theme for your Website Editing.
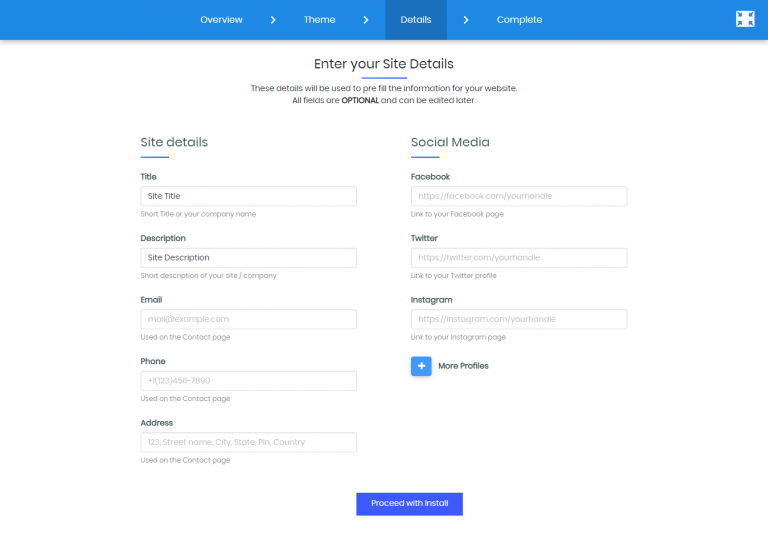
In the Details level, you can change the site details from your previous pre-defined details to your new details or you can keep the details same like the earlier one. After filling all these details you need to click on the “Proceed with Install” button to proceed to the last level.
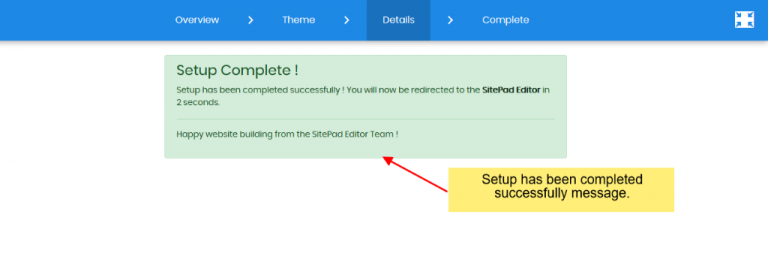
Finally, you have successfully set up the site, This is the last level of the entire setup process. Once you hit this level, you will be automatically redirected to the “website999 Editor” within 5 seconds.
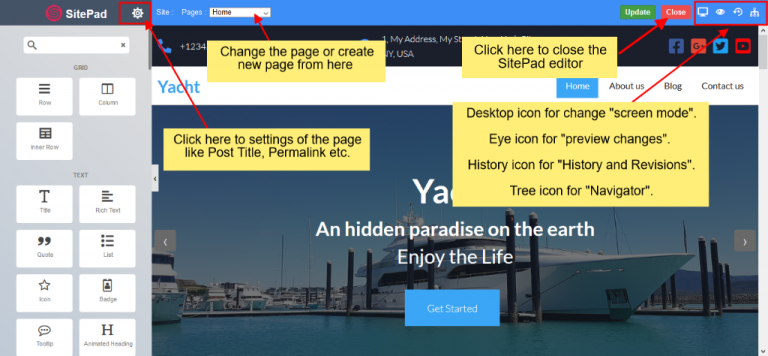
After redirecting, you will see the Home page of your website in the edit mode of website999 Editor. Now you can start editing your website Home page and also you can close the website999 Editor using the close button. After clicking the close button, you will redirect to the SitePad Dashboard.
And you have successfully reset your old template and imported new one.
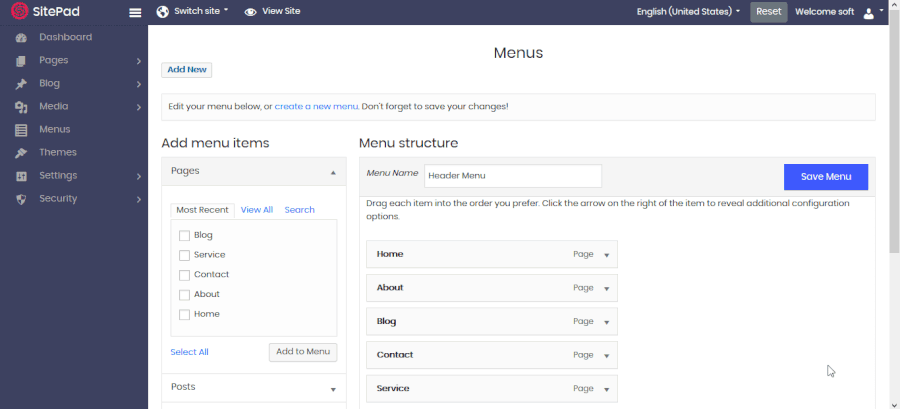
Menus
Adding Menu Items
Creating Custom Link
Creating Sub-Menu Item
Shopping Basket
Stay Inspired.
We're Here To Make Your Website.
Design tips, trends, and ideas — in your inbox.
Join who get exclusive design insights in their inbox.